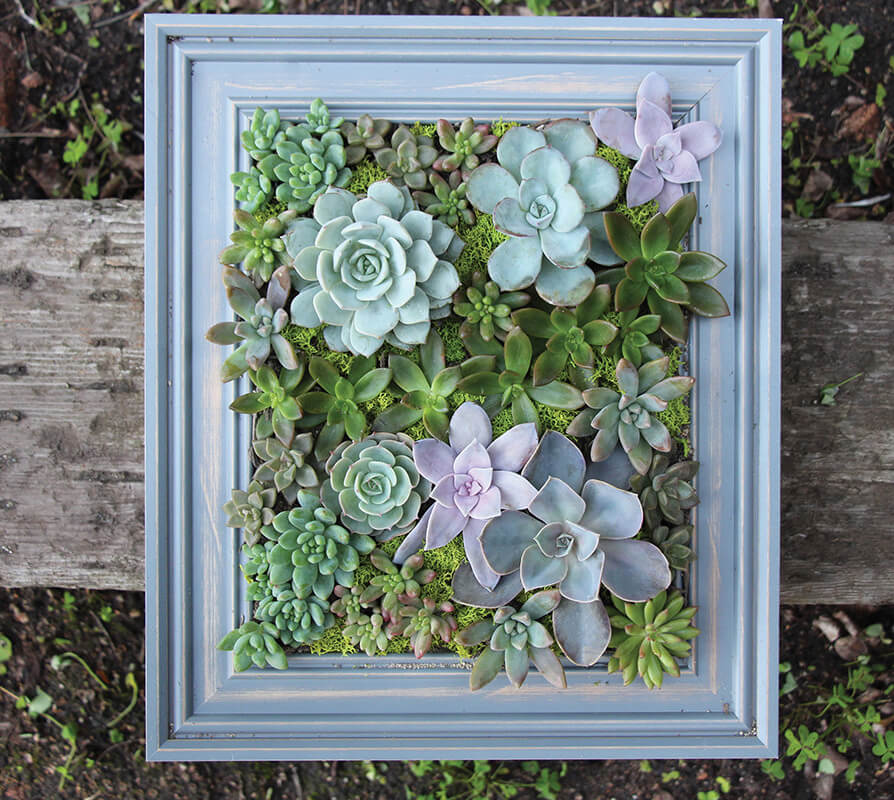
Make this stunning framed succulent
|
|
WHAT YOU WILL NEED:
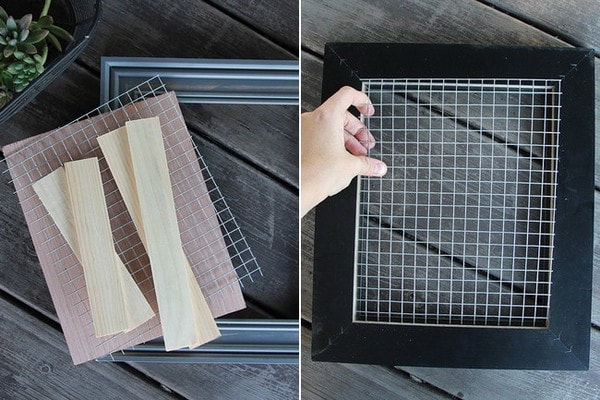
8" x 10" (20cms x 25cms)Wood Picture Frame
Mesh Wire
Wire Cutters
Two Pieces of ¼" x 1.5" x 8" Craft Wood
Two Pieces of ¼" x 1.5" x 10" Craft Wood
Staple Gun and Staples
Saw
Thin Plywood
Frame Hooks (Optional)
Soil
Pencil or similar pointy tool
Succulent Cuttings
Moss
8" x 10" (20cms x 25cms)Wood Picture Frame
Mesh Wire
Wire Cutters
Two Pieces of ¼" x 1.5" x 8" Craft Wood
Two Pieces of ¼" x 1.5" x 10" Craft Wood
Staple Gun and Staples
Saw
Thin Plywood
Frame Hooks (Optional)
Soil
Pencil or similar pointy tool
Succulent Cuttings
Moss
WHAT TO DO
1. Since the frame itself is shallow, you’ll need to use cuttings instead of full plants. This should be done a few days prior to planting to ensure that your stems have had time to callus over. Once your succulents have callused, you are ready to begin this project.
2. Place your frame face down on your workspace. Cut your mesh wire to fit the back opening of your frame and lay it in the opening. When you staple the sides of the box to the frame, the wire gets trapped there and will hold.
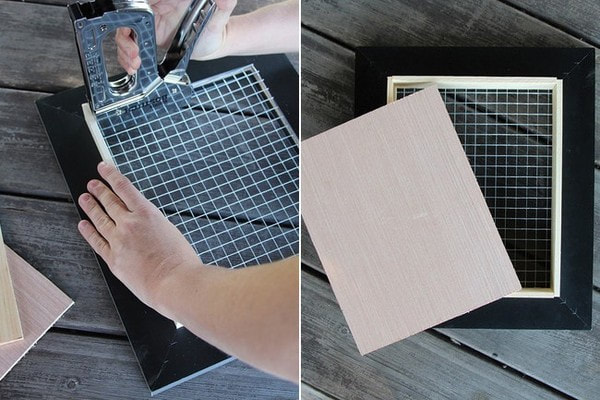
3. Now we’ll make extra support for the inside of the frame, to hold the soil. Take your ¼" pieces of craft wood and staple them to the inside lips of your frame, trapping the wire mesh between the back of the frame and the wood pieces.
1. Since the frame itself is shallow, you’ll need to use cuttings instead of full plants. This should be done a few days prior to planting to ensure that your stems have had time to callus over. Once your succulents have callused, you are ready to begin this project.
2. Place your frame face down on your workspace. Cut your mesh wire to fit the back opening of your frame and lay it in the opening. When you staple the sides of the box to the frame, the wire gets trapped there and will hold.
3. Now we’ll make extra support for the inside of the frame, to hold the soil. Take your ¼" pieces of craft wood and staple them to the inside lips of your frame, trapping the wire mesh between the back of the frame and the wood pieces.
4. This is what the back of the completed frame looks like.
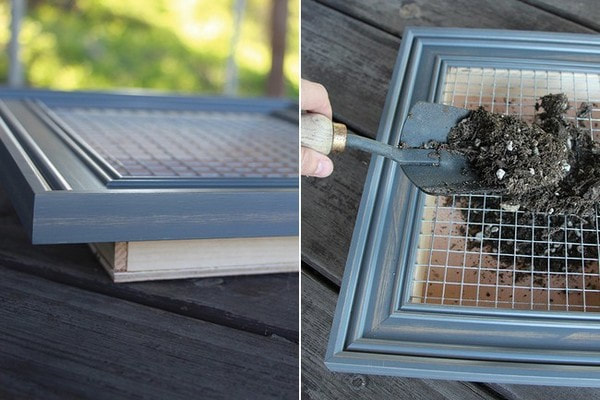
5. Cut your plywood to the dimensions of the opening and staple to the wood sides, creating a bottom for your soil box.
6. At this point, you may want to add a wire, frame hooks, or another hanging mechanism to the back of your frame, if you plan to hang it once the cuttings have rooted.
7. Turn your frame over so it’s right-side up and add soil through the mesh wire. Use your hand to push the soil through the mesh wire. Shake the frame to settle the soil, making room for more.
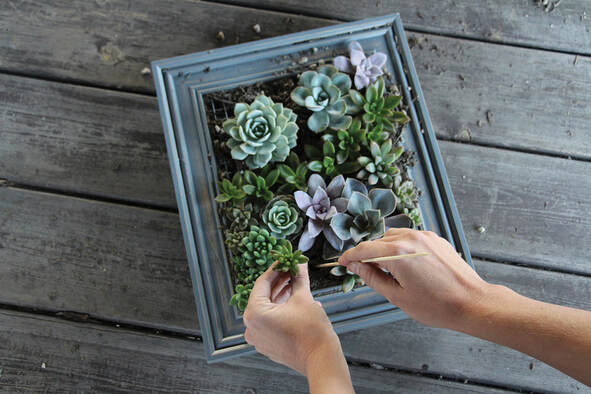
8. Use a pencil (or similar pointy tool) to create a hole in the soil for the stem of your plant.
9. Begin planting your succulent cuttings.
5. Cut your plywood to the dimensions of the opening and staple to the wood sides, creating a bottom for your soil box.
6. At this point, you may want to add a wire, frame hooks, or another hanging mechanism to the back of your frame, if you plan to hang it once the cuttings have rooted.
7. Turn your frame over so it’s right-side up and add soil through the mesh wire. Use your hand to push the soil through the mesh wire. Shake the frame to settle the soil, making room for more.
8. Use a pencil (or similar pointy tool) to create a hole in the soil for the stem of your plant.
9. Begin planting your succulent cuttings.

10. You are creating a living work of art, so be creative with your design. Make it interesting by grouping similar plants together, add one or two larger plants to catch the viewer’s eye, or create waves of similar plants.
11. Use your moss to fill in any empty space and to cover any mesh wire that may be showing.
12. Keep your frame horizontal for about six weeks, or until roots have established. You can check this by looking for new growth or tugging lightly on your plants. If the plants remove easily from the soil, they need more time to take root.
13. Once your plants have taken root, choose where you will hang your masterpiece.
CARE INSTRUCTIONS
Your frame will do best with bright, filtered, or indirect sunlight throughout the day. If you hang the frame indoors, place it near a south-facing window if you live in the northern hemisphere or a north facing window if you live in the opposite hemisphere. You will need to lay the frame horizontally when you water. Water it about every two weeks (monthly when it’s colder) or when the soil is totally dry. Let the soil fully drain before replacing the frame on the wall. Remove dried leaves periodically to keep your frame planter looking its best!
TIP
If you are hanging your vertical garden on a wall, it’s a good idea to add a frame hook to each side of your frame, giving you the option to rotate it every couple of weeks. Over time, succulents tend to grow toward the sun. To keep your plants from stretching in a certain direction, rotate the frame often.