GRANDPARENTS DAY MAGAZINE
  • IN THIS ISSUE
    • Luxury good of the Silk Road
    • The spread of invention
    • Wildlife of the Tea Horse Road
    • History of the Tea Horse Road
    • Silk Road ships
    • Wu who?
    • The rituals of the Southern Silk Road
    • In your corner
    • Ambient Menu
  • FOOD
  • LIFESTYLE
    • TRAVEL
    • Craft Corner
    • BOOKENDS
    • GARDENING >
      • Flora of Yunnan
  • CONTACT US
    • SUPPORT SERVICES

Indoor Fun

Picture
Keeping the grandkids happy and occupied can sometimes tax even the most creative mind.  Here are a number of activities you might like to think about.  They're easy to do and cheap to fund and should keep them happy for hours.  

​If you have any ideas we can pass on to other grandparents use our CONTACT US
 form to share it with us and we'll share it with our readers.
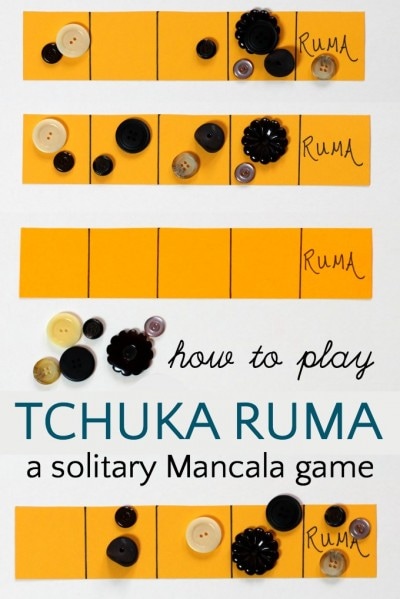
TCHUKA RUMA

Simple DIY games can be very satisfying for kids and can often be played on the spur of the moment, or on the go, much more easily than board games. Ruma is a simple but surprisingly challenging game. It keeps their brain active and they won’t want to stop until they discover the solution. whatwedoallday.com has a video of how to set up and play the game that is worth watching.  You can access it ​here.

What you need:
  • Paper
  • Pen
  • Counters or buttons
Make the board:
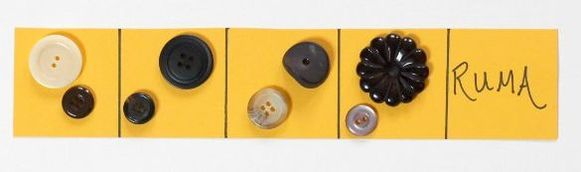
Divide a 10 inch strip of paper into 5 equal sections. We made 2 game boards. One is 10 x 2, the other is 10 x 3. Write “Ruma” in the final end section. (See photo)
Objective: to get all the counters into the “Ruma” section.
Set up: place 2 counters in each of the blank sections.

​How to play:
Pick up counters from any square and drop them, one by one into each section (similar to Mancala) towards the Ruma square. This is called “sowing the seeds”.
What comes next depends on where your last counter falls.
If your last counter falls into Ruma then you move again, sowing seeds starting from the square of your choice.
If your last counter falls into an empty space, you lose.
If your last counter falls into a space already occupied by one or more counters, pick up all the counters from that square and continue sowing the seeds.

Good to know:
There is only one solution that will get all the counters into the Ruma square. There is a mathematical reason for this but we don't need to go into that now. Watch the youtube video here if you want the solution. 
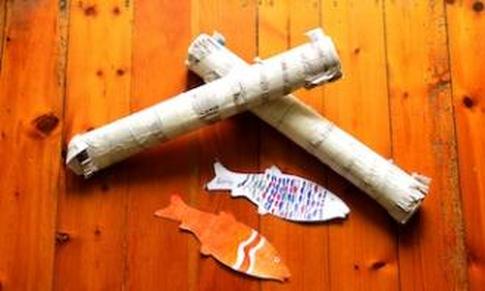
Picture
Picture

FLAP THE KIPPER

What you need
  • 1 x FREE kipper printable for each player
  • 1 x rolled-up newspaper for each player
  • A long hall or clear floor space
Each player creates their own kipper to race.
Traditionally you would cut a kipper shape out of newspaper (which is actually best because the thinner the paper, the more your kipper will flap).
But if you want to get crafty with it, you can print out the free kipper printable and decorate it. Put your name on it so you’ll be sure who won.
Place your paper kippers at the starting line.
Now use the rolled-up newspaper to flap your kipper along by smacking the floor behind it.
The first kipper over the finish line wins.​
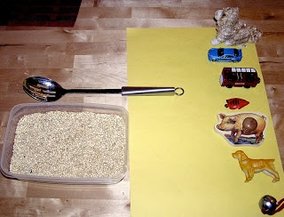
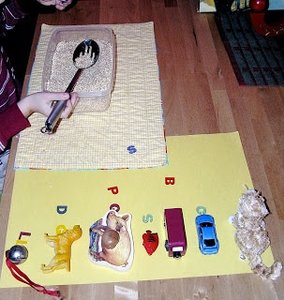
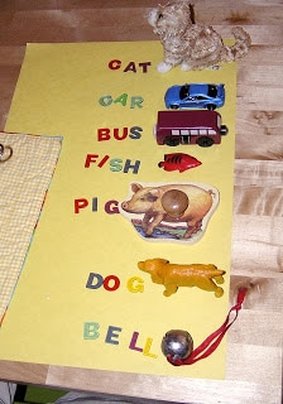
Picture

SIFT AND SPELL

What you need:
  • Small bucket. A shallow, rectangular plastic food container is perfect.
  • Letters. Look for small plastic letters at your local discount shop or craft store. Or you can simply make your own by writing letters on small pieces of cardboard; or use letter magnets if you have them.
  • Slotted Spoon
  • Toys or other small objects.
  • Rice.
Fill the bucket or tray with rice with the small letters hidden inside.  Line up a few toys with 3-4 letter names, such as “cat”, “bell”, “fish” and so on. Make sure that the letters hidden in the rice will indeed spell the names of the objects.

Give the child the slotted spoon and get them to sift through the rice until they find a letter.  Half the fun is actually finding the letters and half is deciding what toy's name they belong to.  Keep sifting and arranging the letters until you have completed the names of all the toys.
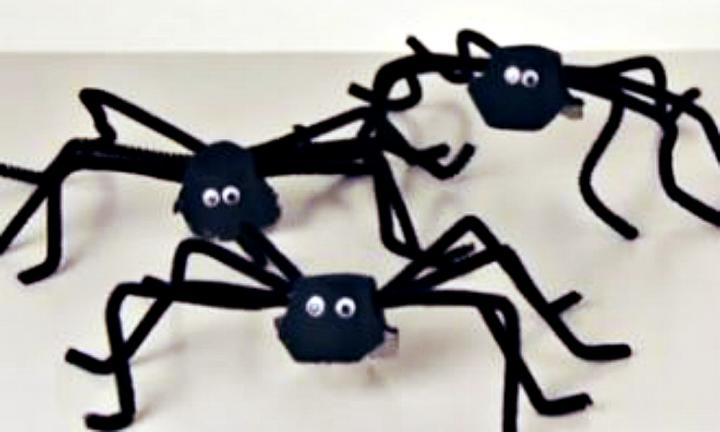
Picture
Picture
Picture

EGG CARTON SPIDERS

Create cool, creepy-crawly egg carton spiders with this fun art and craft kids' activity. 
 
What you need
  •  Black paint
  •  Paintbrush
  •  Egg carton 
  •  Skewer
  •  Black pipe cleaners
  •  Googley eyes
  •  Scissors
  •  White craft glue
 
Cut the bumpy half of your egg carton into individual egg cups.

Using the skewer or sharp pencil, make eight holes in the bottom edge of each egg cup, four on each side (see note), these are for your pipe cleaner legs to poke through. Paint each egg cup black, and let dry.

Push a pipe cleaner in through one hole and out the opposite side's hole. Bend the legs at halfway for knees and then a small section at the end for the feet. Repeat for each of the legs.

Glue on googley eyes, and your egg carton spider is ready to pounce.

Notes:
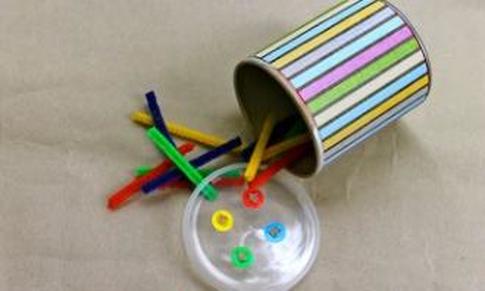
  • To safely punch neat holes in your egg cups, place a large blob of blu-tac on your work surface, and position your egg cup on top where you want your hole to be. Pierce through the egg cup and into the blu tac with your skewer – this creates a neat hole without harming your fingers! A pen or sharp pencil are also good tools for this job.
  • Pre-cut the carton and prepare the holes ahead of time for group or party use.
  • You can make your spiders as colourful as you like. Use bright colours and sprinkle on some glitter before the paint dries.
  • To hang your spider, pierce a hole in the top of each egg cup, and carefully thread the two ends of a 60cm length of string through the hole, so the ends are inside the egg cup. Knot the ends inside the egg cup so it won't pull out, and hang your spider wherever you wish.
Picture

PIPE CLEANER TOY

What you need:
  • 1 x small Pringles container with lid
  • 4 x pipe cleaners in different colours - red, yellow, blue, green
  • wire cutters/pliers
  • a metal skewer
  • coloured stick-on dots (matching the colours of your pipe cleaners)
  • some coloured craft paper or similar (to decorate the can)
What to do:
  • Using the height of the can as a guide, cut your pipe cleaners into sections that will fit, standing up inside the can.
  • Now stick a red, yellow, blue and green dot on the lid of the can.
  • Heat the tip of a metal skewer on a gas stove top and use it to melt/pierce holes through the middle of each sticky dot.
  • Get your child to do a drawing to cover the outside of the tin.  Cut it to size and stick it on to cover the Pringles logo.
  • Encourage your toddler to match the colours of the dots to the colours of the pipe cleaners and push all the pipe cleaners through the holes.
  • Hours of fun for a toddler.
  • Put it in your toddler busy bag and take it with you next time you go to the doctor’s, on a long car trip or anywhere you need your toddler to sit still for a little while.
Picture
About

Terms of Use
Contact Us
Picture
© COPYRIGHT 2017.
ALL RIGHTS RESERVED.
  • IN THIS ISSUE
    • Luxury good of the Silk Road
    • The spread of invention
    • Wildlife of the Tea Horse Road
    • History of the Tea Horse Road
    • Silk Road ships
    • Wu who?
    • The rituals of the Southern Silk Road
    • In your corner
    • Ambient Menu
  • FOOD
  • LIFESTYLE
    • TRAVEL
    • Craft Corner
    • BOOKENDS
    • GARDENING >
      • Flora of Yunnan
  • CONTACT US
    • SUPPORT SERVICES