The Bactrian camel was essential to the flow of goods along much of the the Silk Road. These sturdy animals could go for a week without water and a month without food, surviving on the sparse vegetation and thorn bushes along the way. Of course, when they did come to water they drank copiously, as much as 100 litres in 10 minutes. Celebrate these amazing animals by making this easy craft project with your grandkids. Or make a Chinese kite to fly outside.
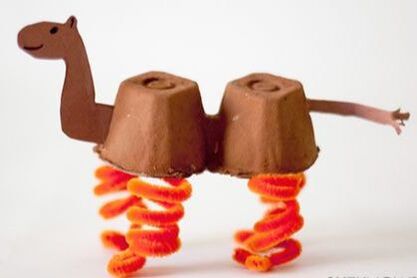
Bactrian camel
|
YOU'LL NEED:
|
|
HERE'S HOW:
- Cut out 2 sections from a cardboard egg carton, leaving them attached to one another.
- Next, paint your egg carton brown and set aside to dry.
- Then cut a 2-inch strip of brown construction paper twice as wide as you want your tail to be and fold in half lengthwise. Cut small slits into the end to form frill for the tail.
- Now cut a head and neck shape from the brown construction paper for the camel’s head. Use the marker to draw shapes for the eye, mouth and a crease in the ear area.
- Next, you’ll need to wind your pipe cleaner around the width of your 2 fingers to form a spring-like shape. At the end you’ll attach to the egg carton, bend at a 45-degree angle, then at the other end, form a 2-loop camel toe shape and bend flat to give your camel feet to stand on. Repeat with all 4 pipe cleaners.
- Use your scissors to cut a slit at the front of your camel to insert the neck and a slit at the back to insert the tail. Add a dab of hot glue to your slits and insert your construction paper head and tail.
- Once dry, turn your camel upside down so you can glue the pipe cleaner legs just inside the egg carton’s edges and with hot glue. Give them a second to dry to ensure they don’t move when you place your camel craft upright again and your animal craft is desert-ready!
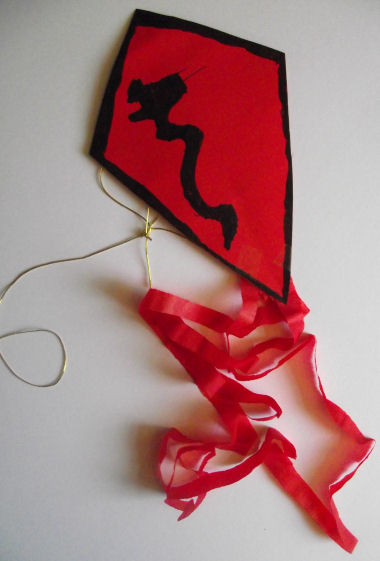
Chinese kite
|
YOU'LL NEED:
HERE'S HOW:
Cut a kite shape from red paper. Decorate with black pen. We went for simple pictures of dragons and a border. Cut strips of tissue paper. Tape 3 or 4 strips to the bottom of the kite. Tape the two straws in a cross on the back of the kite as shown in the picture below. Cut two lengths of string about 18 inches (46cm) long. Thread one through each straw and knot the ends together as shown. Cut a length of string long enough to fly the kite if you wish. Tie one end to the knot that you have just tied. |

|